
InDesign tips: 5 tricks to boost your Adobe InDesign skills
What are InDesign tips?
InDesign tips are techniques and keyboard shortcuts used within Adobe InDesign, Adobe’s desktop publishing application, to streamline layout, typography, and design workflows. They help designers work faster and produce higher-quality print and digital publications — from magazines and posters to ebooks. Applying the right InDesign tips reduces repetitive manual steps and improves consistency across multi-page documents.
Digital content management (DCM) covers planning, creating, collaborating, storing, organizing, and distributing all forms of digital media throughout the content lifecycle.
1. Populate text on every page to save time
A function of Adobe InDesign is a red plus sign at the lower right corner of a text frame that indicates overset (overspill) text. If working on a page with overset text you can thread frames together – click on the plus sign, line up a new frame and your text will flow into it. Connecting frames using in and out ports is known as threading.
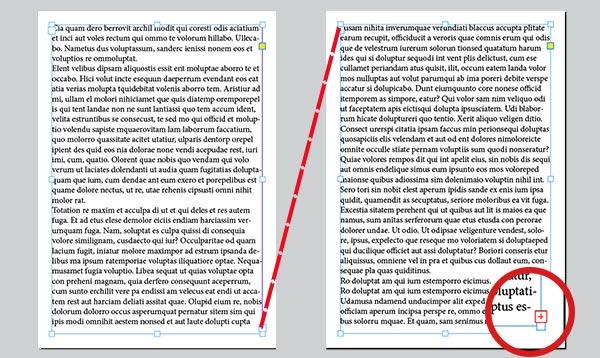
But that’s not all. Save time by automating frames on every page until all text has flowed through an entire document by holding shift and clicking in the margins. This is known as auto flow. Once you have populated text or use an in or out port, your pointer becomes a loaded text icon.
You can now populate pages automatically, and avoid having to create a new frame each time you have overset.
2. Find and replace for improved efficiency
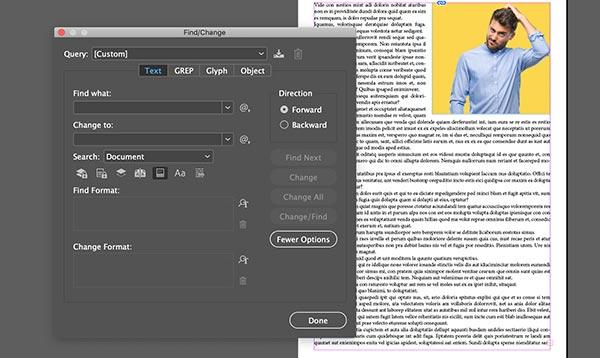
If creating a text-heavy design layout, you’ll probably need to change some keywords or phrases along the way. The dialog box is easily opened with Choose Edit > Find/Change. Click the Text tab for more options. Changing text or metadata is easily done – advanced options include GREP, a pattern-based search option, and glyph.
3. Balance ragged lines to create cleaner layouts
When using text and typography, it’s important to have a layout that’s easy on your readers’ eyes. Layouts can make a huge impression on your brand identity, especially when using snappy captions, pull quotes and centered paragraphs that help you create stand-out content. Utilize this simple function that easily balances your ragged lines.
There are only two steps for balanced ragged lines:
- Locate and click on your targeted text.
- Under paragraph select – balance ragged lines.
4. Preview mode creates a clearer picture with zoom
Switching between normal and preview mode allows you to see a cleaner representation of your work. Clicking the letter W turns the preview on and off. This tool removes any excess bleeds, guides and line blocks, presenting you with a clean version of your work. Throw in a zoom shortcut for multiple viewpoints of your designs: (pc) control or (mac) command with the keys plus for zoom in and minus for zoom out.
5. Eyedropper color five panel selection
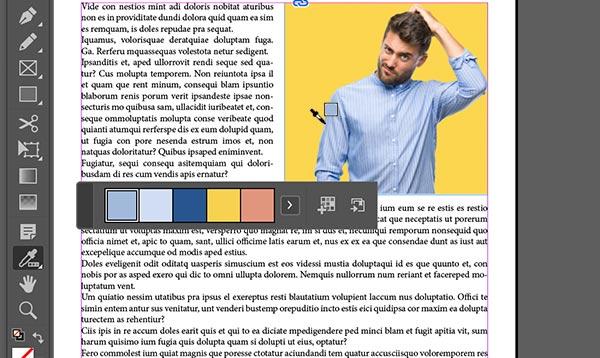
The eyedropper color theme tool allows you to sample popular colors within your design layouts. Switch to the eyedropper icon with the shortcut command or option and I, or by selecting it from the Tool panel. A cool feature is the ability to create a color theme panel. Click on an image or graphic or text and a floating palette based on the colors clicked on will appear.
These InDesign tips will not only save time, but they also help you create impactful design layouts to capture your audience’s attention. Try out a few of these cool tricks as you employ an Adobe InDesign software that’s equipped to help you succeed. And that’s not all – InDesign is fully integrable with Canto, making it even easier for your designs to play a central role in future marketing strategies.