Glossary
Media library software: What it is, core features, and what to look for
Digital content teams accumulate files fast. Images, videos, audio files, and brand assets pile up across local drives, shared folders, and email threads. Without a dedicated system, finding the right file at the right moment becomes a daily frustration. Media library systems solve that by giving teams a single, organized place to store, manage, and share all their digital media across every website, channel, and campaign they run.
What is media library software?
Media library software is a centralized digital hub for storing, organizing, managing, and sharing media files: images, videos, audio, and documents. Rather than scattering assets across individual computers or loosely organized cloud folders, a media library consolidates everything into a structured, searchable system that the whole team can access.
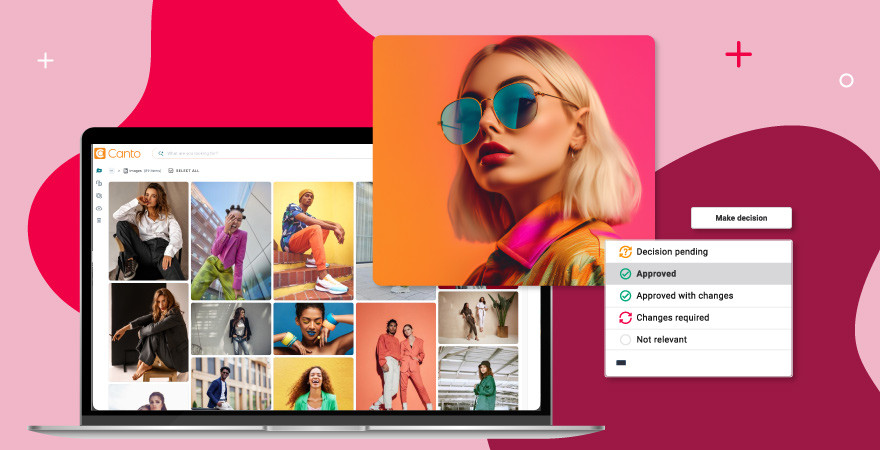
Folder structures group assets logically by campaign, product line, date, or theme. Metadata and tagging add descriptive information to each media file, such as keywords, usage rights, and creator details, making every asset easy to find. Each media file is displayed as a thumbnail or icon so users can identify content at a glance without opening each one individually.
This type of software is sometimes called a digital asset management system, or DAM. Defined, digital asset management technology is a system that stores, organizes, searches, manages, and distributes your brand’s digital assets — all in one place. While the terms overlap, media library software tends to emphasize storage and retrieval, whereas a full DAM platform often adds deeper workflow, permissions, and distribution services.
Understanding intellectual property issues for online media is important for anyone managing a media library. A well-run library helps teams keep track of usage rights, credit creators appropriately, and avoid inadvertent copyright infringement. Version control adds another layer of protection by tracking different versions of a file and maintaining an audit trail, so teams can always see what changed, when, and by whom.
Core features of a media library
A well-built media library does more than store files in one place. It actively enhances how teams find, use, and protect their media. Here is what to expect from a modern platform.
Search and filtering
Strong search is at the heart of any media library. Most platforms let users enter a keyword, tag, or file name to surface matching results immediately, with search results displayed as thumbnails and icons so teams can visually identify assets before selecting one. Filters narrow results by file type, date, or other criteria, while dropdown menus and sort options help users find exactly what they need across large collections of images, videos, and documents.
Uploading and adding new media
Media libraries usually support uploading files directly from a computer or via a URL, and most platforms allow batch uploads so teams can add multiple files at once. This saves significant time when ingesting large collections of images, videos, or audio. Once upload is complete, the platform typically prompts users to add tags, keyword labels, and usage rights to each media file, making those assets easier to find later.
Viewing and navigating the media library
Most media libraries offer two primary views: grid view, which displays files as thumbnails and icons for visual browsing, and list view, which presents file details in a sortable table with column headings such as File, Author, and Date. Clicking a thumbnail typically opens a details panel where users can review file size, upload date, and metadata, and move between files without losing their place. Folder structures and navigation menus keep the library organized, while quick-action options let users copy links, choose download settings, or open files for editing directly from the browser view.
Editing and managing media file details
Good media library software makes it easy to update, replace, or delete assets without disrupting the broader library. Users can modify tags, perform metadata management, or swap in a new version of a file, including updated images or revised videos, while version control preserves the history of previous iterations. Bulk editing tools let teams select multiple files and apply actions such as adding tags, moving to a folder, or deleting in one step, which is particularly useful when managing large or frequently updated collections.
Access controls and permissions settings
Permissions settings define who can view, edit, download, or delete specific media files. Most platforms allow administrators to assign different access levels by user role, which is particularly important for teams working with external partners or across multiple departments. Restrictions can be applied to uploading, deleting images or videos, and modifying metadata, giving teams precise control over how the library is managed and keeping sensitive assets secure.
Download and sharing options
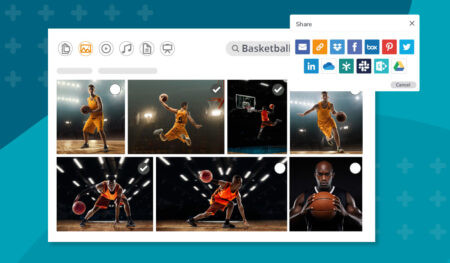
Media libraries make it easy to retrieve and distribute files. Users can download individual assets or select multiple files to package into a single archive, a convenient option when sharing collections of images, videos, and documents with agencies or clients. Download permissions can be restricted by user role so only authorised members can access certain files. Most platforms also support link-based sharing, allowing users to copy and share a direct link to any asset without requiring the recipient to download anything.
How to use a media library: step by step
Whether you are setting up a library for the first time or onboarding a new team, a clear process makes adoption faster and keeps the library useful from day one.
Step 1: Upload your files. Most platforms support uploading directly from a computer or via URL, and batch uploading saves time when adding large volumes of images, videos, audio, and documents. Choosing a destination folder before uploading keeps files organized from the start.
Step 2: Add metadata. Once files are uploaded, adding accurate keyword tags, source information, and usage rights to each media file is one of the most valuable steps a team can take. The more precisely a media file is labelled at this stage, the easier it becomes to find through search and filters later.
Step 3: Organize into folders. A clear folder structure is what keeps a growing media library navigable. Organizing files by campaign, product, or content type from the outset makes it far easier to browse and retrieve assets as the collection scales. Most platforms make it straightforward to create new folders, move files, and rename sections as needs evolve.
Step 4: Search and retrieve. With metadata and folders in place, finding a specific media file should take seconds. Enter a keyword into the search bar, apply filters to narrow results by file type or date, and select the file to view, download, edit, or share. Stacking multiple filters at once is useful when working with large libraries.
Step 5: Share and download. Most platforms offer several options for distributing assets: direct download, link-based sharing, or packaging multiple files into a single archive. Download permissions and shared link settings can be reviewed and updated from within the platform’s settings page, giving teams control over how assets are accessed externally.
Why your team needs a media library
The practical case for media library software comes down to time, consistency, and scale.
Searching for files across scattered locations wastes time. Centralized storage eliminates the need to search for files or wait for transfers, so users can find what they need in seconds. Media libraries enable quick searching, filtering, and self-service downloads, preventing asset duplication and ensuring teams always work from the latest approved version. The gains become significant once you factor in how often a team accesses, uploads, and redistributes images, videos, and other content across a website, social page, or campaign each week.
Brand consistency is another strong argument. When everyone downloads assets from the same media library, they work from approved, up-to-date versions of logos, images, and branded videos. Outdated files no longer make it onto a website. A centralized library acts as a single source of truth, which helps teams represent the brand accurately and reduces inconsistencies across all channels.
Media libraries also grow faster than most teams anticipate. A library that feels manageable today can become unwieldy within a year without structure. A good media library system is built to scale, handling an image library, collections of marketing videos and product videos, and documents while remaining straightforward to use.
Collaboration improves too. When teams share access to the same library, there is no need to send files back and forth or maintain duplicate copies on separate computers. External partners can be granted specific access to only what they need. More media can be added at any time without disrupting the existing organisation.
How to evaluate and select media library software
Not every media library platform will suit every team. Here are the key areas to assess before you select one.
Search and metadata quality. Look for keyword search, metadata filtering, and tag-based browsing. Some platforms support visual search or AI-assisted tagging, which can reduce the manual work of labelling large collections of images, videos, and audio. Icons and a dropdown menu displayed alongside search results help team members distinguish file types and apply filters quickly. Check whether the platform supports search via URL and whether search results can be filtered by a variety of options including file type, date, and tags.
Format support. The best media library software handles a variety of file types: JPEG, PNG, MP4, MP3, PDF, and more. Videos, images, and audio files should be optimised automatically during upload so that upload files require no manual conversion. Learn what formats each platform supports before you commit.
Access and permissions. Review the settings available for managing user roles. Teams need granular control over who can view, edit, download, and delete files. Some platforms support single sign-on and other enterprise standards. Select a platform whose permissions model matches how your team is structured, and look for a clear interface for assigning roles.
Integration with existing tools. A media library that connects with your content management system or creative tools fits more naturally into your process. Look for platforms that offer digital asset management integrations with the tools your team already uses. A well-integrated library means you can link directly to approved videos, images, and documents from within those tools, rather than downloading and re-uploading files manually.
Mobile and multi-device access. Many teams need to access media from a variety of devices, including tablets and smartphones. Confirm the platform provides full functionality on mobile, including the ability to upload, view, and download files from any device.
Media file management in practice
Day-to-day media file management is where the library earns its keep.
When new media is added, assign accurate tags and metadata straight away. Tags enable users to easily find specific assets such as product shots, logos, or team photos without wading through the full library. Using a clear naming convention for videos, images, and audio makes it far simpler to search the library six months later. The more precisely a media file is labelled at upload, the easier it is to surface through search and filters. Note that establishing naming conventions before you begin uploading new media is one of the highest-value steps a team can take. It is simple to overlook and hard to fix retroactively.
Select multiple files and apply bulk actions to delete or archive them at once. When you delete files, check whether they are linked from any live website page first, and follow any review steps your platform requires before you confirm the deletion.
For teams working with third-party images or licensed videos, a media library also supports copyright compliance. Licensing details can be saved alongside each asset, and permission settings restrict use to those with the appropriate rights. Understanding image copyright and how it applies to your media files matters for responsible asset management. It is a core part of any team’s content mission. Creative Commons licenses allow users to legally modify and build upon existing works, while public domain materials can be used without restriction. It is good practice to credit the artist, link that information to the relevant files in your library, and have saved licensing records reviewed and updated periodically as usage rights evolve.
Getting started with a media library
The move to centralized media management is straightforward. Most platforms offer simple system to upload files, intuitive navigation menus, and flexible settings that are quick to configure. Upload settings, download permissions, and access levels are all displayed in a central admin section. Clear icons, a well-organized left-hand menu, and a prominent add button make it simple to learn your way around. A keyboard shortcut guide is often available to help you work faster once you are familiar with the default layout. You can also hold the cursor over any icon to reveal a tooltip explaining what it does.
Before you begin, visit your current storage locations and take stock of where files live, what formats your team uses most, and how many users will need access. Use that information to select a folder structure, then start uploading. Add metadata as you go, including source URLs where relevant, review your settings regularly, and take time to learn the full range of search and filter options your platform offers.
Once everything is in one place, the daily friction of managing media disappears. Your team can focus on creating great content.
Canto’s media library is built for growing content collections
As your media collection expands, Canto grows with it. Canto’s media library gives creative and marketing teams a centralized, searchable home for all their images, videos, audio, and documents, with metadata, tagging, and folder structures that keep everything organized and easy to find at any scale.
Granular permissions settings, version control for digital assets, and self-service downloads mean teams can access, share, and manage approved assets without bottlenecks. And with integrations across the tools your team already uses, Canto fits into your existing workflow rather than disrupting it.

Start with Canto
Make more of your content.
Bring your assets, teams, and workflows together. See what’s possible with Canto.